
Deploying ASP.NET Core Applications with Docker and Kubernetes
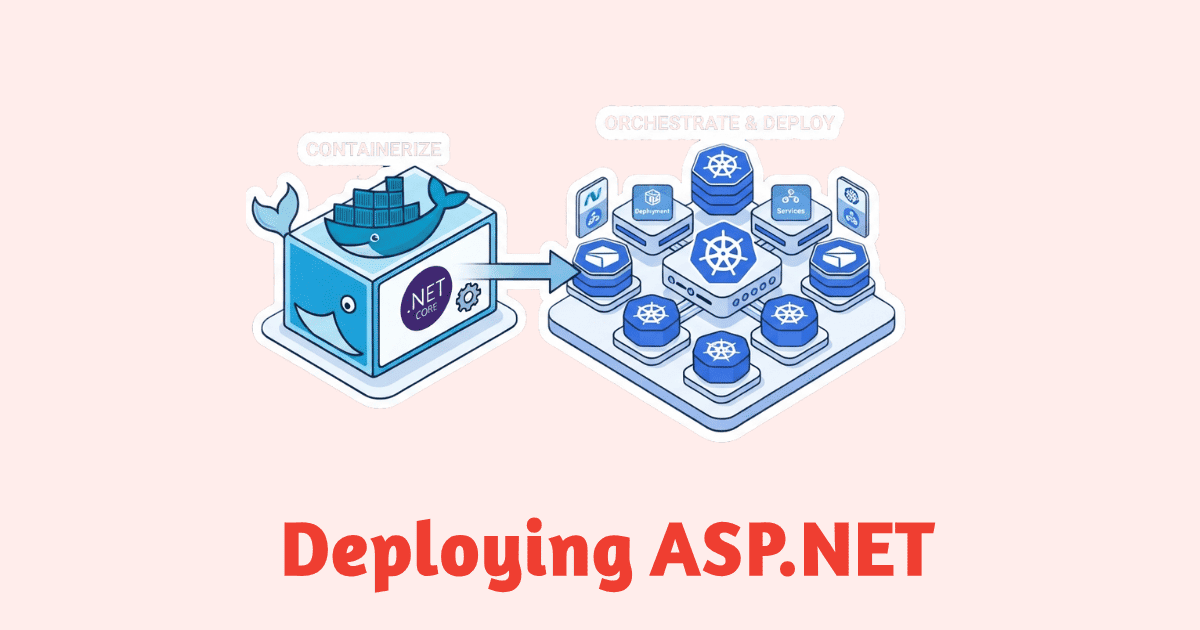
Shipping an ASP.NET Core application to production has never been more exciting, and never been more demanding. Modern teams want speed, reliability, repeatability, and the confidence that a build tested on one machine will behave the same way in staging and production. That is exactly where Docker and Kubernetes shine. Docker gives your ASP.NET Core application a clean, portable runtime environment. Kubernetes takes that containerized application and turns it into something far more resilient, scalable, and manageable. Together, they create a deployment model that feels less like “copying files to a server” and more like operating a living system with clear rules, predictable behavior, and room to grow.
If you have ever experienced the classic deployment pain of missing configuration values, inconsistent .NET runtime versions, forgotten environment settings, or “it works on my machine” incidents, containerization will feel like a breath of fresh air. The beauty of ASP.NET Core is that it was designed with this world in mind. It is lightweight, cross-platform, cloud-ready, and excellent at reading configuration from the environment. That makes it a natural fit for Docker and Kubernetes. But while the stack is powerful, it also has a learning curve. You need to think about image design, startup behavior, health checks, configuration management, networking, resource limits, rollout strategy, and observability. That can sound like a lot, but once you see the pieces in motion, it starts to feel logical and even elegant.
This article walks through the complete journey: containerizing an ASP.NET Core app, running it locally, preparing it for production, and deploying it to Kubernetes with the right structure and safety nets. Along the way, you will see practical code examples that you can adapt to your own projects. The goal is not just to make the app run, but to make it run well in the real world, where traffic changes, pods restart, configurations evolve, and teams depend on predictable delivery.
Why Docker and Kubernetes matter for ASP.NET Core
Before writing any Dockerfile or Kubernetes manifest, it helps to understand why this combination is worth the effort. Docker packages your application together with its runtime dependencies into an image. That image becomes the same unit everywhere: your laptop, a CI server, a staging cluster, or a production environment. Kubernetes then schedules those images across a cluster of machines, restarts them when they fail, scales them when demand rises, and rolls them out gradually when you deploy a new version.
For ASP.NET Core, this is especially valuable because the framework is already modular and efficient. A traditional deployment might rely on the right .NET runtime being installed on a server. A containerized deployment removes that uncertainty. Instead of asking, “Does the server have the right version?”, you ask, “Did we build the right image?” That shift is huge. It turns deployment from an environment problem into a build problem, and build problems are much easier to automate.
Kubernetes adds the operational layer that teams eventually need once an application grows beyond a single machine. It can recover from failures, distribute replicas, expose services, manage secrets, and apply autoscaling policies. For an ASP.NET Core API serving web and mobile clients, this means less manual babysitting and more confidence that the application will continue to respond even if a node goes down or a release introduces an issue.
That said, Docker and Kubernetes are not magic. They solve real problems, but they also introduce real discipline. Your application must start cleanly, exit gracefully, log clearly, read configuration properly, and behave well under orchestration. Fortunately, ASP.NET Core supports all of this very well.
A sample ASP.NET Core API to deploy
To make the journey concrete, imagine a simple ASP.NET Core Web API called TaskManager.Api. It exposes endpoints for tasks, health checks, and a small set of operational diagnostics. The same principles apply whether your app is an API, a Razor Pages app, a Blazor Server app, or a background worker. The examples here focus on an API because it keeps the deployment story easy to follow.
A minimal Program.cs might look like this:
var builder = WebApplication.CreateBuilder(args);

builder.Services.AddControllers();
builder.Services.AddEndpointsApiExplorer();
builder.Services.AddSwaggerGen();

var app = builder.Build();

if (app.Environment.IsDevelopment())
{
    app.UseSwagger();
    app.UseSwaggerUI();
}

app.MapControllers();

app.MapGet("/health", () => Results.Ok(new
{
    status = "healthy",
    timestamp = DateTime.UtcNow
}));

app.Run();
This application is small, but it already includes the patterns we want in production: controllers, optional Swagger in development, and a health endpoint. In real projects, you would also add dependency injection for database access, caching, logging, authentication, and observability.
The first step is to make sure the app can run locally, then inside a Docker container, and finally inside Kubernetes. That progression matters because each layer increases complexity. If something fails in Kubernetes, you do not want to wonder whether the failure started in your app, your image, or your cluster configuration. The cleaner your local foundation, the easier the rest becomes.
Building a production-ready Dockerfile
The Dockerfile is where your application becomes an image. For ASP.NET Core, a multi-stage build is the standard approach. It keeps the final image small and secure by separating the build environment from the runtime environment. In the first stage, you restore packages, build the project, and publish the output. In the second stage, you copy only the published files into a runtime image.
Here is a strong starting point:
# Stage 1: build
FROM mcr.microsoft.com/dotnet/sdk:8.0 AS build
WORKDIR /src

COPY *.sln ./
COPY TaskManager.Api/*.csproj ./TaskManager.Api/
RUN dotnet restore

COPY . .
WORKDIR /src/TaskManager.Api
RUN dotnet publish -c Release -o /app/publish --no-restore

# Stage 2: runtime
FROM mcr.microsoft.com/dotnet/aspnet:8.0 AS runtime
WORKDIR /app

ENV ASPNETCORE_URLS=http://+:8080
ENV ASPNETCORE_ENVIRONMENT=Production

EXPOSE 8080

COPY --from=build /app/publish .
ENTRYPOINT ["dotnet", "TaskManager.Api.dll"]
This Dockerfile is intentionally simple, but it already contains important production choices. The runtime container listens on port 8080, which is a common non-privileged port inside containers. The environment is set to Production by default. The published output is copied from the build stage, so the final image does not contain the SDK or the full build toolchain. That smaller attack surface is a real advantage.
There are a few subtle points worth paying attention to. First, ASPNETCORE_URLS=http://+:8080 tells Kestrel to listen on all interfaces in the container, which is necessary because Kubernetes or Docker will forward traffic from outside the container. Second, EXPOSE 8080 is not a security feature by itself, but it documents the port and helps with tooling. Third, the ENTRYPOINT should point to the compiled DLL, which is the standard deployment model for ASP.NET Core in Linux containers.
A .dockerignore file is just as important as the Dockerfile. It keeps unnecessary files out of the build context and makes image builds faster:
bin/
obj/
.git/
.vs/
Dockerfile
docker-compose*.yml
README.md
That may look unglamorous, but small details like this save time every day. Faster builds mean faster feedback. Faster feedback means fewer mistakes.
Running the container locally
Before you think about Kubernetes, you should prove that the container works on its own. Build the image and run it locally:
docker build -t taskmanager-api:1.0 .
docker run --rm -p 8080:8080 taskmanager-api:1.0
Then open:
http://localhost:8080/health
If the endpoint responds properly, the container is at least starting and serving traffic. This is the first checkpoint. It is surprisingly common to discover that an application assumes a development environment variable, relies on a local file path, or uses a port that conflicts with container expectations. Catching that early is worth the effort.
If your app needs configuration values, pass them as environment variables:
docker run --rm -p 8080:8080 \
  -e ASPNETCORE_ENVIRONMENT=Production \
  -e ConnectionStrings__DefaultConnection="Server=localhost;Database=Tasks;User Id=sa;Password=Your_password123;" \
  taskmanager-api:1.0
Notice the double underscore in ConnectionStrings__DefaultConnection. ASP.NET Core maps double underscores to nested configuration keys, which makes environment variables a natural way to inject settings in containers and Kubernetes.
If your application depends on a database, Redis instance, or external API, those dependencies should be handled explicitly. In a local setup, that often means Docker Compose.
Using Docker Compose for local development
Docker Compose helps you define a multi-container environment for development and testing. For an ASP.NET Core API, a common setup might include the API itself and a SQL Server database. This gives your team a realistic local environment without forcing everyone to manually install every dependency.
Here is an example docker-compose.yml:
version: "3.9"

services:
  api:
    build:
      context: .
      dockerfile: Dockerfile
    container_name: taskmanager-api
    ports:
      - "8080:8080"
    environment:
      ASPNETCORE_ENVIRONMENT: Production
      ConnectionStrings__DefaultConnection: Server=db;Database=TaskManager;User Id=sa;Password=Your_password123;TrustServerCertificate=True
    depends_on:
      - db

  db:
    image: mcr.microsoft.com/mssql/server:2022-latest
    container_name: taskmanager-db
    environment:
      ACCEPT_EULA: "Y"
      MSSQL_SA_PASSWORD: "Your_password123"
    ports:
      - "1433:1433"
This setup is useful, but it is also a reminder of a deeper truth: local development and production are not identical. Compose is excellent for development, but production deserves stronger guarantees around secrets, health probes, storage, scaling, and scheduling. Still, Compose helps you close the gap between local behavior and cluster behavior.
A helpful habit is to make your application fail fast if it cannot connect to required services. If the database is mandatory, the app should not pretend everything is fine. It should log the issue clearly and exit or surface a proper failure. In Kubernetes, that behavior becomes especially important because it allows probes and restarts to do their job correctly.
Designing ASP.NET Core for containers
A container-friendly ASP.NET Core application behaves a little differently from a traditional server-hosted app. It should start quickly, read configuration from the environment, log to stdout, and shut down gracefully when it receives a termination signal. These are not exotic requirements. They are simply the natural requirements of a containerized system.
One important adjustment is logging. In containers, the simplest and most reliable pattern is to write logs to stdout and stderr. Kubernetes collects those streams and makes them accessible through kubectl logs and centralized logging tools. Avoid relying solely on local files unless you have a very good reason and a clear plan for storage.
Another important adjustment is graceful shutdown. Kubernetes will eventually terminate your pod during a rollout, scale-down, or node maintenance event. ASP.NET Core supports graceful shutdown out of the box, but your code should avoid abrupt process exits and should give in-flight requests enough time to finish. Long-running background tasks should respect cancellation tokens.
For example, a background service might look like this:
public class TaskSyncService : BackgroundService
{
    private readonly ILogger<TaskSyncService> _logger;

    public TaskSyncService(ILogger<TaskSyncService> logger)
    {
        _logger = logger;
    }

    protected override async Task ExecuteAsync(CancellationToken stoppingToken)
    {
        _logger.LogInformation("Task sync service started.");

        while (!stoppingToken.IsCancellationRequested)
        {
            try
            {
                _logger.LogInformation("Synchronizing tasks...");
                await Task.Delay(TimeSpan.FromMinutes(1), stoppingToken);
            }
            catch (OperationCanceledException)
            {
                break;
            }
        }

        _logger.LogInformation("Task sync service stopped.");
    }
}
And then register it:
builder.Services.AddHostedService<TaskSyncService>();
This pattern makes your app more Kubernetes-friendly because the worker respects shutdown signals. That matters more than many teams realize. A clean shutdown can prevent partial writes, duplicate processing, and ugly deployment surprises.
Configuring the application with environment variables
ASP.NET Core has excellent configuration support, and that is one reason it fits so well in containerized environments. Rather than hardcoding values into files that get baked into the image, use environment variables or mounted configuration when appropriate.
A sample configuration section might look like this in appsettings.json:
{
  "ConnectionStrings": {
    "DefaultConnection": ""
  },
  "ExternalServices": {
    "NotificationBaseUrl": "",
    "ApiKey": ""
  }
}
Then override values in the environment:
ConnectionStrings__DefaultConnection=Server=db;Database=TaskManager;User Id=sa;Password=Your_password123;TrustServerCertificate=True
ExternalServices__NotificationBaseUrl=https://notifications.example.com
ExternalServices__ApiKey=your-api-key
In Kubernetes, these values can come from ConfigMaps and Secrets. That separation is important. Non-sensitive configuration belongs in ConfigMaps. Sensitive values belong in Secrets or, better yet, an external secret management system if your environment supports one.
A good rule of thumb is this: if changing the value does not require secrecy, put it in a ConfigMap. If exposure would be harmful, treat it as a Secret. That distinction keeps your deployment cleaner and your operational model more understandable.
Introducing Kubernetes in practical terms
Kubernetes can feel intimidating at first because it introduces a vocabulary of Pods, Deployments, Services, ConfigMaps, Secrets, Ingresses, and more. But once you map those concepts to real operational needs, they become easier to understand.
A Pod is the smallest deployable unit. In practice, it usually runs one containerized application. A Deployment manages a set of Pods and handles rollouts, scaling, and updates. A Service provides a stable network endpoint for Pods, which may come and go. A ConfigMap injects non-secret configuration. A Secret injects sensitive values. An Ingress exposes HTTP traffic from outside the cluster to inside services, usually with a host name and TLS.
For an ASP.NET Core app, a common pattern is one Deployment, one Service, optional ConfigMaps and Secrets, and an Ingress if the application is web-facing. That alone gets you very far.
The key mindset shift is that Kubernetes is declarative. You do not tell it, “Run this container forever.” You tell it, “This is the desired state.” Kubernetes then tries to make reality match that state. If a pod crashes, it starts another one. If you request three replicas, it keeps three running. If you update the image, it performs a rollout.
This is powerful, but it means your application should be written with that model in mind. Pods are disposable. Persistent state should live elsewhere, usually in databases or persistent volumes. Treat the container as cattle, not as a pet.
Creating a Kubernetes Deployment
Let’s start with a basic Deployment for the ASP.NET Core API:
apiVersion: apps/v1
kind: Deployment
metadata:
  name: taskmanager-api
  labels:
    app: taskmanager-api
spec:
  replicas: 3
  selector:
    matchLabels:
      app: taskmanager-api
  template:
    metadata:
      labels:
        app: taskmanager-api
    spec:
      containers:
        - name: api
          image: your-registry/taskmanager-api:1.0
          ports:
            - containerPort: 8080
          env:
            - name: ASPNETCORE_ENVIRONMENT
              value: "Production"
            - name: ASPNETCORE_URLS
              value: "http://+:8080"
            - name: ConnectionStrings__DefaultConnection
              valueFrom:
                secretKeyRef:
                  name: taskmanager-secrets
                  key: connectionString
          resources:
            requests:
              cpu: "100m"
              memory: "128Mi"
            limits:
              cpu: "500m"
              memory: "512Mi"
This manifest already contains several production-minded choices. It runs three replicas, which provides basic availability. It uses a secret for the connection string. It defines resource requests and limits, which help Kubernetes schedule the pod properly and protect the cluster from runaway usage. It exposes port 8080, matching the Dockerfile.
The resources block deserves special attention. Requests are what the scheduler uses when deciding where to place pods. Limits cap the resources the container can consume. Setting these values forces you to think about actual runtime behavior instead of assuming the app can use infinite CPU and memory. That thinking is healthy. It leads to better stability and often uncovers performance issues earlier.
If your application handles traffic spikes or slower startup times, you may also want a rolling update strategy and probes. More on those shortly.
Exposing the app with a Kubernetes Service
A Deployment alone does not provide a stable network address. For that, you need a Service:
apiVersion: v1
kind: Service
metadata:
  name: taskmanager-api
spec:
  selector:
    app: taskmanager-api
  ports:
    - protocol: TCP
      port: 80
      targetPort: 8080
  type: ClusterIP
This Service routes traffic to pods labeled app: taskmanager-api. It exposes port 80 inside the cluster and forwards to port 8080 in the container. A ClusterIP service is internal to the cluster, which is a good default. If you want to expose it externally, use an Ingress.
This indirection may seem unnecessary at first, but it is one of Kubernetes’ most useful design features. Pods are ephemeral. Their IP addresses change. Services provide a stable name that other components can use. That stability is what allows deployments to be replaced without breaking traffic routing.
Adding readiness and liveness probes
Probes are one of the most important parts of a production Kubernetes deployment. They help Kubernetes determine whether the application is ready to receive traffic and whether it should be restarted. For an ASP.NET Core app, a lightweight health endpoint is ideal.
First, define separate health endpoints if possible. A readiness endpoint can check dependencies such as the database. A liveness endpoint can check whether the application process is alive and responsive. For example:
builder.Services.AddHealthChecks()
    .AddCheck("self", () => Microsoft.Extensions.Diagnostics.HealthChecks.HealthCheckResult.Healthy());

var app = builder.Build();

app.MapHealthChecks("/health/live");
app.MapHealthChecks("/health/ready");

app.Run();
A more realistic implementation might perform a database check in readiness:
builder.Services.AddHealthChecks()
    .AddSqlServer(
        builder.Configuration.GetConnectionString("DefaultConnection"),
        name: "sqlserver",
        failureStatus: Microsoft.Extensions.Diagnostics.HealthChecks.HealthStatus.Unhealthy);
Then configure probes in the Deployment:
apiVersion: apps/v1
kind: Deployment
metadata:
  name: taskmanager-api
spec:
  replicas: 3
  selector:
    matchLabels:
      app: taskmanager-api
  template:
    metadata:
      labels:
        app: taskmanager-api
    spec:
      containers:
        - name: api
          image: your-registry/taskmanager-api:1.0
          ports:
            - containerPort: 8080
          readinessProbe:
            httpGet:
              path: /health/ready
              port: 8080
            initialDelaySeconds: 10
            periodSeconds: 10
            timeoutSeconds: 3
            failureThreshold: 3
          livenessProbe:
            httpGet:
              path: /health/live
              port: 8080
            initialDelaySeconds: 30
            periodSeconds: 15
            timeoutSeconds: 3
            failureThreshold: 3
These probes are not decoration. They are the difference between a pod that is technically running and a pod that is actually ready. Readiness prevents traffic from hitting a half-started app. Liveness lets Kubernetes restart a stuck or broken process. Together, they make your deployment much more resilient.
A common mistake is to set the readiness path to something too expensive or too broad, such as a full dependency chain that includes several remote systems. Keep liveness simple. Keep readiness meaningful but not overly heavy. The goal is signal, not punishment.
ConfigMaps and Secrets
Applications often need both non-sensitive and sensitive configuration. Kubernetes gives you tools for both.
A ConfigMap for general settings:
apiVersion: v1
kind: ConfigMap
metadata:
  name: taskmanager-config
data:
  ASPNETCORE_ENVIRONMENT: "Production"
  Logging__LogLevel__Default: "Information"
  ExternalServices__NotificationBaseUrl: "https://notifications.example.com"
A Secret for sensitive data:
apiVersion: v1
kind: Secret
metadata:
  name: taskmanager-secrets
type: Opaque
stringData:
  connectionString: "Server=db;Database=TaskManager;User Id=sa;Password=Your_password123;TrustServerCertificate=True"
Then use them in the Deployment:
envFrom:
  - configMapRef:
      name: taskmanager-config
  - secretRef:
      name: taskmanager-secrets
This is cleaner than hardcoding everything in the manifest, and it supports the principle of separating configuration from code. It also makes updates easier. When a setting changes, you update the ConfigMap or Secret rather than rebuilding the entire application image.
That said, be thoughtful with secrets. Kubernetes Secrets are base64-encoded, not magically encrypted in every setup. In many environments, you should integrate with a dedicated secret store or at least enable encryption at rest and strong access controls. Security is a system, not a checkbox.
Ingress for external traffic
If your ASP.NET Core app needs to be accessed from outside the cluster, an Ingress is often the cleanest way to do it. It provides host-based or path-based routing and can terminate TLS.
A simple Ingress might look like this:
apiVersion: networking.k8s.io/v1
kind: Ingress
metadata:
  name: taskmanager-ingress
spec:
  ingressClassName: nginx
  rules:
    - host: api.example.com
      http:
        paths:
          - path: /
            pathType: Prefix
            backend:
              service:
                name: taskmanager-api
                port:
                  number: 80
In a real deployment, you would usually add TLS:
apiVersion: networking.k8s.io/v1
kind: Ingress
metadata:
  name: taskmanager-ingress
spec:
  ingressClassName: nginx
  tls:
    - hosts:
        - api.example.com
      secretName: taskmanager-tls
  rules:
    - host: api.example.com
      http:
        paths:
          - path: /
            pathType: Prefix
            backend:
              service:
                name: taskmanager-api
                port:
                  number: 80
The Ingress controller itself is a separate component that must be installed in the cluster. Once it is in place, Ingress gives you a flexible and scalable entry point for HTTP traffic. It also keeps your application manifests cleaner than exposing multiple LoadBalancer services for every service in the cluster.
Autoscaling the application
Kubernetes can scale your application automatically based on CPU or memory usage. The Horizontal Pod Autoscaler, or HPA, is a practical way to handle spikes in traffic.
Here is an example:
apiVersion: autoscaling/v2
kind: HorizontalPodAutoscaler
metadata:
  name: taskmanager-api-hpa
spec:
  scaleTargetRef:
    apiVersion: apps/v1
    kind: Deployment
    name: taskmanager-api
  minReplicas: 3
  maxReplicas: 10
  metrics:
    - type: Resource
      resource:
        name: cpu
        target:
          type: Utilization
          averageUtilization: 70
This tells Kubernetes to keep the deployment between 3 and 10 replicas and to scale up when average CPU usage reaches around 70 percent. This is a reasonable starting point, but it is not universal. Different applications scale differently. Some are CPU heavy, some are memory heavy, and some need custom metrics. The important thing is to treat autoscaling as part of your performance plan, not an afterthought.
For ASP.NET Core APIs, scaling often works well when requests are stateless and the application does not depend on local in-memory state for correctness. If you need session data, use a distributed store such as Redis or redesign the flow to remain stateless. Stateless services are much easier to scale.
Handling database migrations
One of the trickiest parts of deploying ASP.NET Core applications is database schema changes. The app may deploy successfully, but the new version may expect a schema that does not exist yet. This can happen if migrations are not coordinated carefully.
There are several strategies. One common approach is to run migrations as a separate step during the deployment pipeline. Another is to run them during application startup. The right choice depends on your risk tolerance and operational model. Startup migrations are convenient, but they can slow down pod initialization and complicate failure handling. Separate migration jobs are often cleaner in Kubernetes.
For example, an init job or separate one-off job might run:
dotnet ef database update
In production, though, many teams prefer a controlled migration container or pipeline step rather than having every pod attempt the migration at once. That avoids race conditions and reduces the chance of duplicate work.
A safer pattern is to make migrations explicit and versioned. Deploy the new database schema first when compatible, then deploy the new application. Or use backwards-compatible changes so that both old and new versions can run during a rolling update. This is where careful API and database design pay off.
Rolling updates without downtime
One of the strongest reasons to use Kubernetes is the ability to roll out new versions gradually. Instead of replacing every pod at once, Kubernetes can update them in a controlled sequence. That is far safer for a live service.
A Deployment can be configured for rolling updates like this:
apiVersion: apps/v1
kind: Deployment
metadata:
  name: taskmanager-api
spec:
  replicas: 3
  strategy:
    type: RollingUpdate
    rollingUpdate:
      maxUnavailable: 1
      maxSurge: 1
This tells Kubernetes to keep at least some pods available during the rollout. Combined with readiness probes, this reduces the chance of downtime. If the new version fails readiness, Kubernetes keeps the old version serving traffic until the problem is resolved.
This is where many teams first feel the real value of Kubernetes. A deployment is no longer a nervous all-or-nothing event. It becomes a controlled replacement process with safeguards built in.
Observability: logs, metrics, and tracing
Deployment is only half the story. Once the app is running, you need to know what it is doing. That means logs, metrics, and, ideally, tracing. ASP.NET Core can integrate with structured logging frameworks, OpenTelemetry, and metrics exporters, all of which become much more valuable when your app is inside containers and Kubernetes.
A simple logging configuration might use Serilog:
using Serilog;

Log.Logger = new LoggerConfiguration()
    .WriteTo.Console()
    .CreateLogger();

var builder = WebApplication.CreateBuilder(args);
builder.Host.UseSerilog();
Structured logs are especially useful in Kubernetes because you can search by fields instead of plain text. When a production issue happens, the ability to ask “show me all errors for this request ID” is worth its weight in gold.
For metrics, you might expose Prometheus-compatible endpoints or use OpenTelemetry to export traces and metrics to your observability stack. The exact tools vary, but the principle is the same: container orchestration without observability is like driving at night with your headlights off.
Security considerations
It is easy to focus on making the app run and forget that production also means security. Docker and Kubernetes do not automatically make an application secure. They give you the tools to be secure, but you still have to use them wisely.
Start with the container image. Use minimal base images where possible. Keep the runtime image separate from the build image. Do not run unnecessary processes in the container. Avoid running as root if your application does not require it. Many ASP.NET Core images can be configured to use a non-root user or a restricted runtime setup.
Consider this approach:
FROM mcr.microsoft.com/dotnet/aspnet:8.0 AS runtime
WORKDIR /app
ENV ASPNETCORE_URLS=http://+:8080
EXPOSE 8080

COPY --from=build /app/publish .
USER app
ENTRYPOINT ["dotnet", "TaskManager.Api.dll"]
The exact user configuration depends on the image and your setup, but the idea is consistent: reduce privileges wherever possible. Also scan images regularly for vulnerabilities and keep the base images updated.
In Kubernetes, control access carefully with namespaces, role-based access control, secret management, and network policies if your cluster supports them. Limit what services can talk to each other. Do not expose more than necessary. Secure the Ingress with TLS. Rotate credentials. These are not glamorous tasks, but they are the difference between a production system and a production liability.
A complete example from Docker to Kubernetes
Let’s put the pieces together. Suppose you have the following simplified project structure:
TaskManager/
  TaskManager.Api/
    Controllers/
    Program.cs
    TaskManager.Api.csproj
  TaskManager.sln
  Dockerfile
  .dockerignore
  kubernetes/
    deployment.yaml
    service.yaml
    configmap.yaml
    secret.yaml
    ingress.yaml
    hpa.yaml
Your Dockerfile builds the image. Your Kubernetes manifests define the runtime behavior. Your CI pipeline builds and pushes the image, then updates the deployment. A very common flow looks like this:
Developer merges code into the main branch.
CI runs tests and builds the Docker image.
The image is pushed to a container registry.
CD updates the Kubernetes deployment to the new image tag.
Kubernetes performs a rolling update.
Probes verify readiness.
Traffic shifts to the new version.
Here is a sample CI command sequence:
docker build -t registry.example.com/taskmanager-api:1.0.0 .
docker push registry.example.com/taskmanager-api:1.0.0
kubectl apply -f kubernetes/
kubectl set image deployment/taskmanager-api api=registry.example.com/taskmanager-api:1.0.0
In more mature environments, the deployment update is usually handled by a pipeline or GitOps tool, not a manual kubectl set image command. Still, the idea is the same: the image tag is the unit of release.
Common mistakes to avoid
A lot of container and Kubernetes frustration comes from a few recurring mistakes. The first is baking environment-specific values into the image. An image should be as environment-agnostic as possible. The more you hardcode, the less reusable it becomes.
The second mistake is ignoring startup time. Some ASP.NET Core apps take a while to initialize, especially if they connect to databases, pre-load caches, or warm up services. If your liveness probe is too aggressive, Kubernetes may kill the app before it has a chance to become healthy. That feels like a mysterious failure when it is really a timing issue.
The third mistake is not setting resource requests and limits. Without them, Kubernetes has a harder time scheduling pods predictably. One noisy service can consume more than its fair share and hurt the rest of the cluster.
The fourth mistake is treating readiness and liveness as the same thing. They are not the same. Readiness is about serving traffic. Liveness is about staying alive. Mixing them together can create difficult debugging situations.
The fifth mistake is using stateful local disk assumptions inside the container. If your app writes to a file in the container and expects it to persist across pod restarts, that will not hold up unless you use persistent storage. Containers are not servers with sticky identities. They are replaceable units.
A note on Windows containers versus Linux containers
Most ASP.NET Core deployments today use Linux containers because they are smaller, faster to move, and very well supported. That said, Windows containers are still an option in some environments, especially when legacy dependencies demand it. The broad deployment principles remain similar, but the base images, tooling, and operational expectations differ.
If you do not have a specific Windows requirement, Linux containers are usually the simpler and more common choice. They integrate smoothly with Kubernetes and keep images lean. That simplicity often matters more than people expect.
What changes when you deploy at scale
When the application is small, deployment can feel straightforward. Build the container, apply the manifest, and call it a day. At scale, the real work begins. You start to care about multiple environments, image scanning, secrets rotation, rollout policies, service-to-service communication, autoscaling behavior, and on-call support. The good news is that Docker and Kubernetes scale with you.
For example, in a multi-environment setup, you might have:
a development namespace with faster iteration and looser resource limits,
a staging namespace that mirrors production closely,
a production namespace with stricter access controls and observability.
You may also adopt Helm charts or Kustomize to manage variations between environments. That helps you keep the manifests maintainable. A plain YAML file is fine to start with, but as the system grows, templating becomes valuable.
Helm example of a values file:
replicaCount: 3

image:
  repository: registry.example.com/taskmanager-api
  tag: "1.0.0"

service:
  port: 80

env:
  ASPNETCORE_ENVIRONMENT: "Production"
This lets you reuse the same chart for multiple environments with different values. That is often a cleaner long-term model than duplicating YAML files everywhere.
A human view of the deployment process
It is easy to talk about containers and orchestration as if they are purely technical abstractions, but there is a human side to this too. Teams feel the difference when deployments become predictable. Developers stop fearing release day. Operations teams spend less time on manual fixes. Product teams gain confidence that the app can grow without falling apart every time traffic increases. Even users feel it, though they may never know why things suddenly feel smoother.
There is also a pleasant mental shift in how you think about software. A deployment is no longer a physical copy of a folder onto a machine. It becomes a declared state with repeatable rules. That may sound dry at first, but in practice it creates a sense of calm. The infrastructure becomes less personal and more principled. You spend less energy fighting hidden differences and more energy improving the app itself.
That is one reason this approach has become so popular. It is not only about scale. It is about reducing the emotional cost of release management. When your process is solid, your team can focus on building features instead of chasing environment drift.
Troubleshooting deployment issues
Even with a good setup, something will eventually go wrong. A pod may stay in CrashLoopBackOff. A readiness probe may fail. The app may start but return 500 errors. The database connection may be rejected. The image may fail to pull from the registry. These problems are normal, and the more comfortable you are with debugging them, the more confident you will feel in production.
Start with the basics:
kubectl get pods
kubectl describe pod <pod-name>
kubectl logs <pod-name>
kubectl get svc
kubectl get ingress
If the pod is not starting, look at events and logs. If the pod is starting but not ready, check the readiness probe path and timing. If traffic is not reaching the app, verify the Service selector and Ingress rules. If the application is crashing, inspect startup exceptions carefully. Often the root cause is a bad connection string, missing secret, unsupported port, or an initialization failure.
For ASP.NET Core specifically, pay attention to the container’s listening address. If the app listens on localhost inside the container instead of 0.0.0.0, external traffic will not reach it. That is a classic container networking mistake. ASPNETCORE_URLS=http://+:8080 usually avoids that problem.
A stronger production checklist
Before you call the deployment complete, it helps to verify a simple checklist:
The application builds successfully in CI.
The Docker image is multi-stage and does not include build tools in the runtime layer.
The container listens on a known port and binds to all interfaces.
Configuration values are injected from the environment or mounted resources.
Secrets are not baked into the image.
The app has health endpoints.
Kubernetes readiness and liveness probes are configured.
Resource requests and limits are set.
The Service correctly routes traffic.
An Ingress or load balancer exposes the app as needed.
Rollouts are controlled and tested.
Logs are accessible and useful.
Database migrations are handled deliberately.
Security permissions are minimal and reviewed.
That checklist is not flashy, but it is practical. In production work, practical beats flashy almost every time.
Example: a polished ASP.NET Core Program.cs for containers
To close the loop, here is a more complete Program.cs that includes controllers, health checks, and logging:
using Microsoft.AspNetCore.Diagnostics.HealthChecks;
using Serilog;

Log.Logger = new LoggerConfiguration()
    .MinimumLevel.Information()
    .WriteTo.Console()
    .CreateLogger();

try
{
    var builder = WebApplication.CreateBuilder(args);

    builder.Host.UseSerilog();

    builder.Services.AddControllers();
    builder.Services.AddEndpointsApiExplorer();
    builder.Services.AddSwaggerGen();

    builder.Services.AddHealthChecks()
        .AddCheck("self", () => Microsoft.Extensions.Diagnostics.HealthChecks.HealthCheckResult.Healthy());

    var app = builder.Build();

    if (app.Environment.IsDevelopment())
    {
        app.UseSwagger();
        app.UseSwaggerUI();
    }

    app.MapControllers();

    app.MapHealthChecks("/health/live");
    app.MapHealthChecks("/health/ready", new HealthCheckOptions
    {
        Predicate = _ => true
    });

    app.MapGet("/", () => Results.Ok(new
    {
        service = "TaskManager API",
        status = "running",
        environment = app.Environment.EnvironmentName
    }));

    app.Run();
}
catch (Exception ex)
{
    Log.Fatal(ex, "Application terminated unexpectedly");
}
finally
{
    Log.CloseAndFlush();
}
This kind of setup feels small, but it gives you a strong base for containerized deployment. It supports health checks, structured logs, and environment-aware behavior. That is exactly what you want before putting the app under orchestration.
Conclusion
Deploying ASP.NET Core applications with Docker and Kubernetes is not just a technical exercise. It is a shift toward reliability, repeatability, and operational maturity. Docker gives you a consistent runtime package. Kubernetes gives you scheduling, scaling, resilience, and rollouts. ASP.NET Core fits this model beautifully because it is already designed around configuration, dependency injection, health checks, and cross-platform deployment.
The path from local development to production usually looks like this: make the app container-friendly, build a clean Docker image, test it locally, define Kubernetes resources carefully, expose the app through Services and Ingress, add probes and resource limits, and then automate the rollout through CI/CD. Each step adds a little structure, and each layer reduces uncertainty.
What makes this approach especially satisfying is that it rewards good engineering habits. Small things matter: port binding, graceful shutdown, environment variables, readiness probes, structured logs, and versioned images. When these details come together, the result is a deployment process that feels calm instead of chaotic. That is a big deal, especially in teams where releases used to be stressful events.
If you are just getting started, do not try to perfect everything at once. Begin with one ASP.NET Core app, one Dockerfile, one Kubernetes Deployment, and one Service. Add health checks next. Then add configuration management. Then add Ingress, scaling, and observability. Step by step, the system will become more robust. The best deployments are rarely built in one dramatic leap. They are built through steady, careful improvement, and ASP.NET Core gives you a very solid foundation to do exactly that.